How Electric Dryer Parts & Components Work Part 3
This page provides a description as well as simple testing methods for each of the parts and components related to an electric dryer. All tests should be preformed with the dryer unplugged and all wires connected to the part being tested unplugged.
(Note: Label all terminals and connecting wires before disconnecting them for proper reinstallation.)
Click Here For Gas Dryer Parts & Troubleshooting Help
Door Switch:
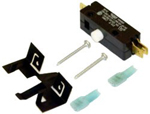 The dryer's door switch senses if the door is open or closed. When the door is closed the switch will close, allowing power to circulate through the rest of the circuit. When the dryer door is open the switch will open, breaking electrical contact to the neutral connection of the circuit and stopping the flow of electricity. Some door switches are "single pole double throw" meaning that when the door is opened the dryer's main component circuit is open, but the dryer's drum light is energized. Most often the actuator arm of this switch will physically break off. However, sometimes the switch will break internally with no external indicators.
Test: How-To Test A Dryer Door Switch Video.
Remove all connecting wires and check for continuity across the switch's main component circuit. There should be no resistance measured (a closed circuit, allowing electricity to flow).
Belt Switch:
Some dryer models use a belt switch attached to the belt tension pulley, which will open if the dryer's belt breaks, not allowing the dryer to operate. Symptoms of a broken belt are similar to that of a broken door switch. The dryer will not start, or stops suddenly in the middle of a dry cycle.
Test: How-To Test A Clothes Dryer Belt Switch Video.
Remove all connecting wires to the belt switch and test for continuity across the switch terminals. There should be no resistance measured (a closed circuit, allowing electricity to flow).
Belt Tension Pulley:
The belt pulley (also called the idler pulley) keeps tension on the belt, creating the small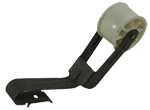 amount of friction necessary for the belt to grip the motor and the drum. Dryer manufacturers have used a variety of belts and pulley designs through the years. Most methods of belt / pulley installation can be found on the dryer pulley installation page. The tension pulley can be responsible for some squeaking noises as well as causing the belt to burn. Other possible causes of these same symptoms could be drum supports, or any component that would make it difficult for the drum to rotate freely.
Dryer Belt Installation Help By Brand
Drum Bearing: 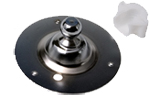
The dryer's drum can be supported by a number of methods. Some dryers use a rear drum bearing to support the weight of the dryer drum and wet clothing. Others use nylon or felt to pad the contact points between the dryer's moving and stationary parts. These bearings can wear out and cause squeaking and scraping noises. In extreme cases, where loud dryer noises have been ignored for long periods of time, the motor may no longer be able to turn the drum and a humming noise will replace the grinding. Allowing grinding and squeaking noises to continue without repair can greatly increase the cost of repair.
Drum Support:
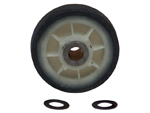 Dryers use several different methods and components to support the drum and allow it to rotate with ease. Most designs have a series of rollers that hold the drum in position and a felt material that reduces friction and creates a light air seal for proper airflow. Some manufacturers, such as General Electric and Frigidaire, use a single ball bearing that is mounted to the back of the dryer drum. This bearing turns within a lubricated nylon cradle mounted to the dryer's stationary rear bulkhead. Some dryer models simply have pads that resist friction to support the drum and allow rotation. Any of these supporting methods can wear out over time and cause squeaking and grinding noises.
Test: Visual inspection of all points of contact between the moving drum and stationary points is the best way to determine if one ore more components need replacement.
Thermistor:
A thermistor is a variable resistor that fluctuates the resistance it offers to a circuit 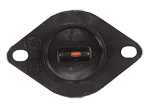 with temperature change. In this way the thermistor can communicate with a solid-state control board and give very accurate temperature readings. The symptoms of a faulty thermistor could be an error code, incorrect dryer temperatures, or no heat. Thermistors have very specific resistance requirements that are usually listed on a technical sheet located somewhere inside your dryer.
Test: To test a thermistor, disconnect all connecting wires and perform a resistance check. The correct resistance value must be identified for your model and can usually be found on your dryer's wiring diagram or technical guide, located somewhere inside the dryer.
Air Flow:
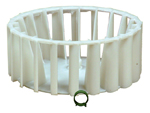 A dryer's airflow system is as important as the heat that the dryer generates. A dryer can be as hot as Hades, but if the moisture-saturated air is not removed from the area your clothing will not dry. Clogged internal and home ducting is the number one cause of long dry times and poor drying performance. Disconnecting the dryer's duct and running a test load will often solve long dry times. If the dryer now magically works, check the ducting for blockages. Dryer manufacturers often suggest limiting duct length to no more than ten feet, each 90º angle in the homes ducting is like adding 5 feet to its length. Vertical home ducting can also be a common source of clogged ducting and heating issues.
Click Here for a great dryer duct cleaning tool!
Back to Top